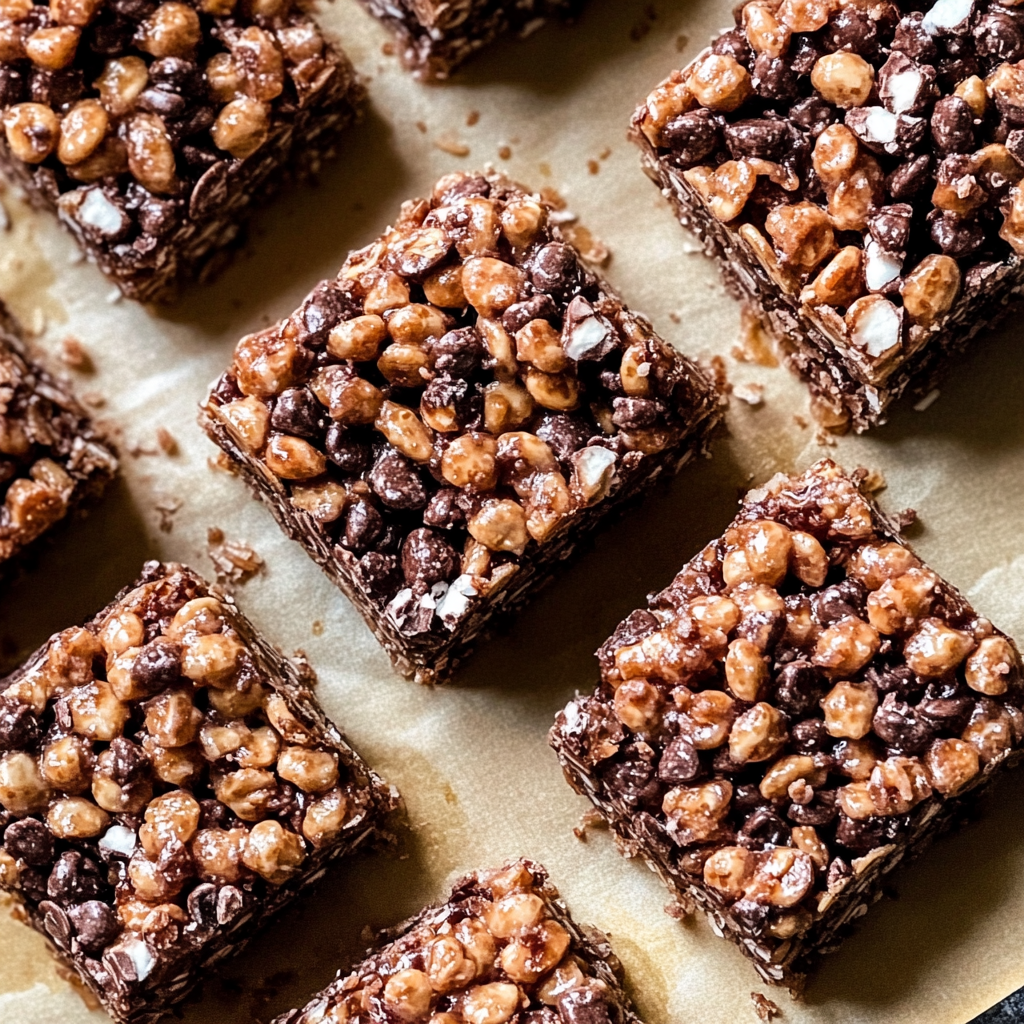
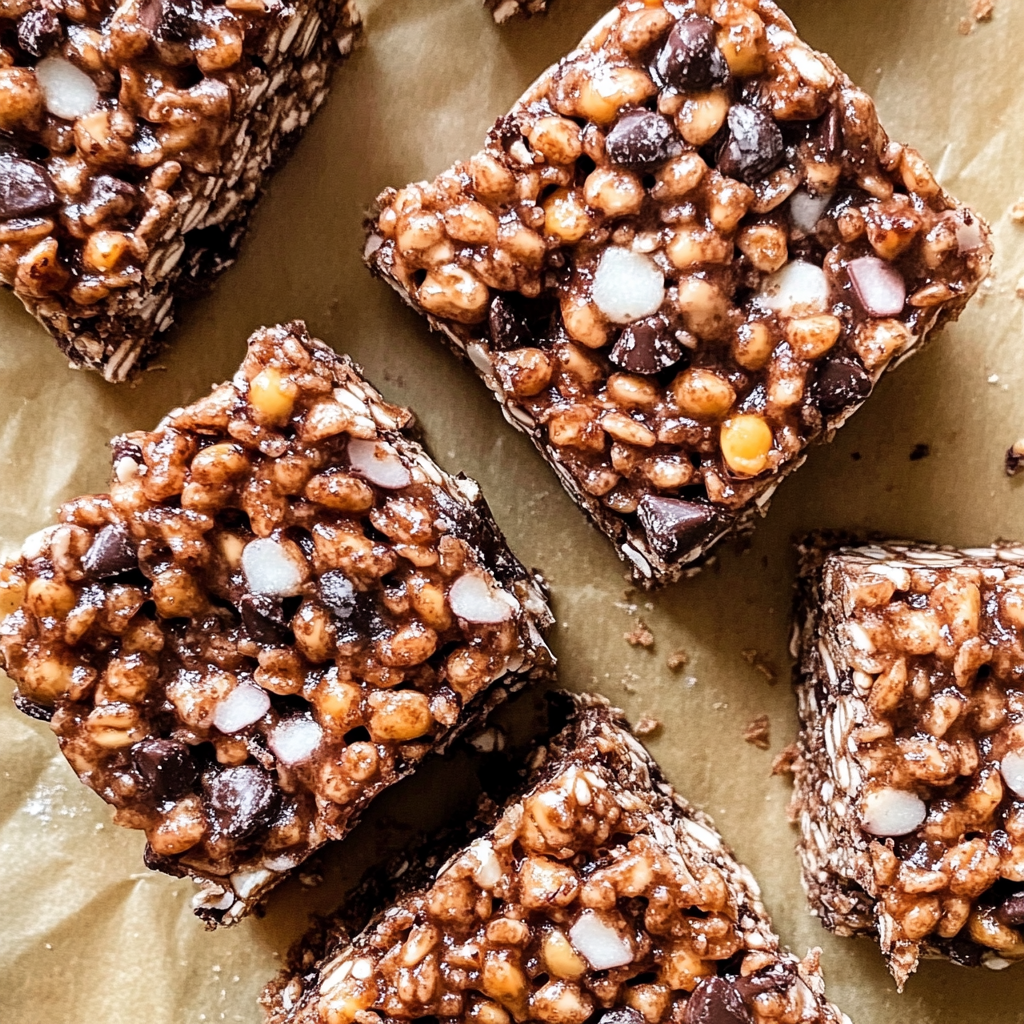
Muddy Buddy Rice Krispies
If you’re looking for a delightful treat that brings back childhood memories, you’ve come to the right place! These Muddy Buddy Rice Krispies are a sweet twist on a classic favorite, combining the irresistible crunch of Rice Krispies with creamy peanut butter and rich chocolate. Whether you’re hosting a family gathering or just need a quick snack to satisfy your sweet tooth after a long day, these no-bake goodies are perfect for any occasion. Plus, they come together in just 15 minutes!
What makes this recipe truly special is how easy it is to whip up. You only need a handful of simple ingredients, and the whole family can join in on the fun of mixing and shaking. It’s hard to resist the delicious blend of flavors and textures that these treats offer!
Why You’ll Love This Recipe
- Quick and Easy: With only 15 minutes of prep time, you can enjoy these tasty treats without spending hours in the kitchen.
- Family-Friendly: Kids love helping out with this no-bake recipe, making it a great way to bond while creating something delicious.
- Versatile Treat: Perfect for parties, lunchboxes, or just as an afternoon snack—these Muddy Buddy Rice Krispies fit any occasion!
- Delicious Flavor: The combination of chocolate and peanut butter is always a crowd-pleaser, ensuring everyone will come back for more.
Ingredients You’ll Need
Let’s gather some simple and wholesome ingredients to make our Muddy Buddy Rice Krispies! This recipe uses pantry staples that you likely already have at home.
For the Treats
- 6 cups Rice Krispies cereal
- 2 cups chocolate chips
- 1/2 cup creamy peanut butter
- 1/4 cup unsalted butter
- 1 teaspoon vanilla extract
For Coating
- 1 1/2 cups powdered sugar, shaken (or 1/2 cup, sprinkled)
Variations
One of the best things about Muddy Buddy Rice Krispies is their flexibility! Feel free to get creative with these variations:
- Add Some Crunch: Mix in chopped nuts or seeds for an extra layer of texture.
- Go Nut-Free: Substitute sunflower seed butter for those with nut allergies while keeping all the deliciousness intact.
- Mix in Extras: Toss in mini marshmallows or dried fruit before coating for added sweetness.
- Make it Festive: Add seasonal sprinkles on top after coating them in powdered sugar for holidays or special occasions!
How to Make Muddy Buddy Rice Krispies
Step 1: Prepare Ingredients
Start by measuring out all your ingredients. Having everything ready makes the process smooth and enjoyable. It’s like setting up your baking station for success!
Step 2: Melt Chocolate and Peanut Butter
In a microwave-safe bowl, combine the chocolate chips and peanut butter. Melt them together in 30-second intervals, stirring until smooth. This step is key because it ensures that your mixture is perfectly blended without burning anything.
Step 3: Combine Ingredients
Add the unsalted butter and vanilla extract to your melted mixture. Stir well until everything is combined; this creates that luscious chocolate-peanut butter goodness that will coat your cereal.
Step 4: Mix with Rice Krispies
In a large mixing bowl, combine the Rice Krispies cereal with your chocolate-peanut butter mixture. Gently fold until every piece of cereal is coated. Be careful not to crush them—this keeps those satisfying crunchy bits intact!
Step 5: Spread and Cool
Spread the coated mixture onto a baking sheet or into a pan lined with parchment paper. Let it cool at room temperature until set. Cooling helps it firm up so that you can cut neat squares later.
Step 6: Add Powdered Sugar
Once cooled, transfer the bars into a resealable plastic bag with powdered sugar inside. Seal it tight and shake gently to coat each piece evenly. For presentation, you could also dust them lightly on top instead.
Step 7: Serve and Enjoy
Cut your Muddy Buddy Rice Krispies into squares and serve! Enjoy this delightful treat at home or pack some up for friends; they’ll surely love this sweet surprise!
Pro Tips for Making Muddy Buddy Rice Krispies
Creating the perfect Muddy Buddy Rice Krispies treats can be a delightful experience, and with these handy tips, you’ll be a pro in no time!
- Use Quality Chocolate Chips: Opting for higher-quality chocolate chips will enhance the flavor of your treats. Good chocolate melts smoothly and gives a richer taste to your finished bars.
- Measure Precisely: Accurate measurements can make or break your recipe. Too much cereal can lead to dry bars, while too little may make them difficult to form.
- Cool Completely Before Coating: Allow the mixture to cool fully before adding powdered sugar. This ensures that the sugar adheres well, giving you that beautiful finish without clumping.
- Experiment with Mix-Ins: Feel free to add extras like mini marshmallows or nuts for added texture. These ingredients can bring a new dimension of flavor and crunch to your treats.
- Store Properly: Keep your Muddy Buddy Rice Krispies in an airtight container at room temperature. This keeps them fresh and chewy, ready for whenever you need a sweet snack!
How to Serve Muddy Buddy Rice Krispies
When it comes to serving your delicious Muddy Buddy Rice Krispies, presentation can elevate the experience! Here are some fun ideas to make your treats even more special.
Garnishes
- Drizzle of Chocolate: A light drizzle of melted chocolate over the top adds an elegant touch and makes each bite even more indulgent.
- Sprinkle of Sea Salt: A pinch of sea salt on top can balance the sweetness beautifully, giving each square an unexpected flavor twist.
- Chopped Nuts: Scatter some chopped nuts like almonds or walnuts for extra crunch and flavor. They also add a nice contrast to the creamy base.
Side Dishes
- Fresh Fruit Salad: A colorful fruit salad is a refreshing contrast to the rich flavors of the Rice Krispies treats. The natural sweetness and acidity from fruits like berries, apples, or citrus will complement them perfectly.
- Yogurt Parfait: Layering yogurt with granola and fresh fruit creates a delicious side dish that pairs wonderfully with the treats. The creamy texture of yogurt balances out the crunchiness of the bars.
- Veggie Platter with Hummus: For a savory contrast, serve a platter of fresh vegetables alongside some creamy hummus. The freshness of veggies provides a nice balance to the sweetness.
With these serving suggestions, your Muddy Buddy Rice Krispies will not only taste amazing but look fantastic too! Enjoy sharing this delightful treat with family and friends!
Make Ahead and Storage
These Muddy Buddy Rice Krispies are perfect for meal prep! They store well and can be made ahead of time, making them an ideal treat for busy days or special occasions.
Storing Leftovers
- Store the leftover Muddy Buddy Rice Krispies in an airtight container at room temperature.
- They will stay fresh for up to one week.
- If you prefer a firmer texture, keep them in the fridge.
Freezing
- Cut the bars into squares before freezing for easy access.
- Place the squares in a single layer on a baking sheet to freeze individually.
- Once frozen, transfer them to a resealable plastic bag or airtight container. They can be stored in the freezer for up to three months.
Reheating
- For best results, allow the frozen bars to thaw at room temperature before serving.
- If desired, you can briefly microwave them for about 10-15 seconds to soften slightly before enjoying.
FAQs
Here are some common questions about making and enjoying Muddy Buddy Rice Krispies:
Can I use crunchy peanut butter instead of creamy for Muddy Buddy Rice Krispies?
Absolutely! Using crunchy peanut butter will add an extra layer of texture to your treats, making them even more delightful.
What substitutes can I use if I don’t have chocolate chips for Muddy Buddy Rice Krispies?
You can use carob chips or dairy-free chocolate chips as alternatives. Both options will give you a deliciously sweet treat without compromising flavor.
How long do Muddy Buddy Rice Krispies last?
When stored properly in an airtight container at room temperature, they can last up to one week. If refrigerated, they may last even longer!
Can I add other mix-ins to my Muddy Buddy Rice Krispies?
Yes! Feel free to experiment with mini marshmallows, nuts, or even dried fruits for added flavor and texture.
Final Thoughts
I hope you find joy in making these delightful Muddy Buddy Rice Krispies! They are not only quick and easy but also offer a wonderful blend of flavors and textures that everyone will love. Whether you’re preparing them for a gathering or just as a sweet snack at home, these treats are sure to bring smiles all around. Enjoy every bite and happy cooking!
Muddy Buddy Rice Krispies
If you’re searching for a sweet and nostalgic treat, look no further than Muddy Buddy Rice Krispies. This delightful dessert combines the classic crunch of Rice Krispies with creamy peanut butter and rich chocolate, making it an irresistible snack for both kids and adults. Perfect for family gatherings, lunchboxes, or as an afternoon pick-me-up, these no-bake goodies come together in just 15 minutes. With simple ingredients and a fun preparation process, your family can bond over this easy recipe while creating delicious memories. Enjoy the satisfying mix of flavors and textures that will keep everyone coming back for more!
- Prep Time: 15 minutes
- Cook Time: None
- Total Time: 0 hours
- Yield: Approximately 15 servings 1x
- Category: Dessert
- Method: No-Bake
- Cuisine: American
Ingredients
- 6 cups Rice Krispies cereal
- 2 cups chocolate chips
- 1/2 cup creamy peanut butter
- 1/4 cup unsalted butter
- 1 teaspoon vanilla extract
- 1 1/2 cups powdered sugar (for coating)
Instructions
- Measure all ingredients to ensure a smooth cooking process.
- In a microwave-safe bowl, combine chocolate chips and peanut butter; melt in 30-second intervals until smooth.
- Stir in unsalted butter and vanilla extract until combined.
- In a large mixing bowl, gently fold the Rice Krispies into the chocolate-peanut butter mixture until fully coated.
- Spread onto a parchment-lined baking sheet and let cool until set.
- Transfer cooled bars to a resealable plastic bag with powdered sugar; shake to coat evenly.
- Cut into squares and enjoy!
Nutrition
- Serving Size: 1 square (40g)
- Calories: 180
- Sugar: 18g
- Sodium: 45mg
- Fat: 8g
- Saturated Fat: 4g
- Unsaturated Fat: 4g
- Trans Fat: 0g
- Carbohydrates: 25g
- Fiber: 1g
- Protein: 3g
- Cholesterol: 10mg