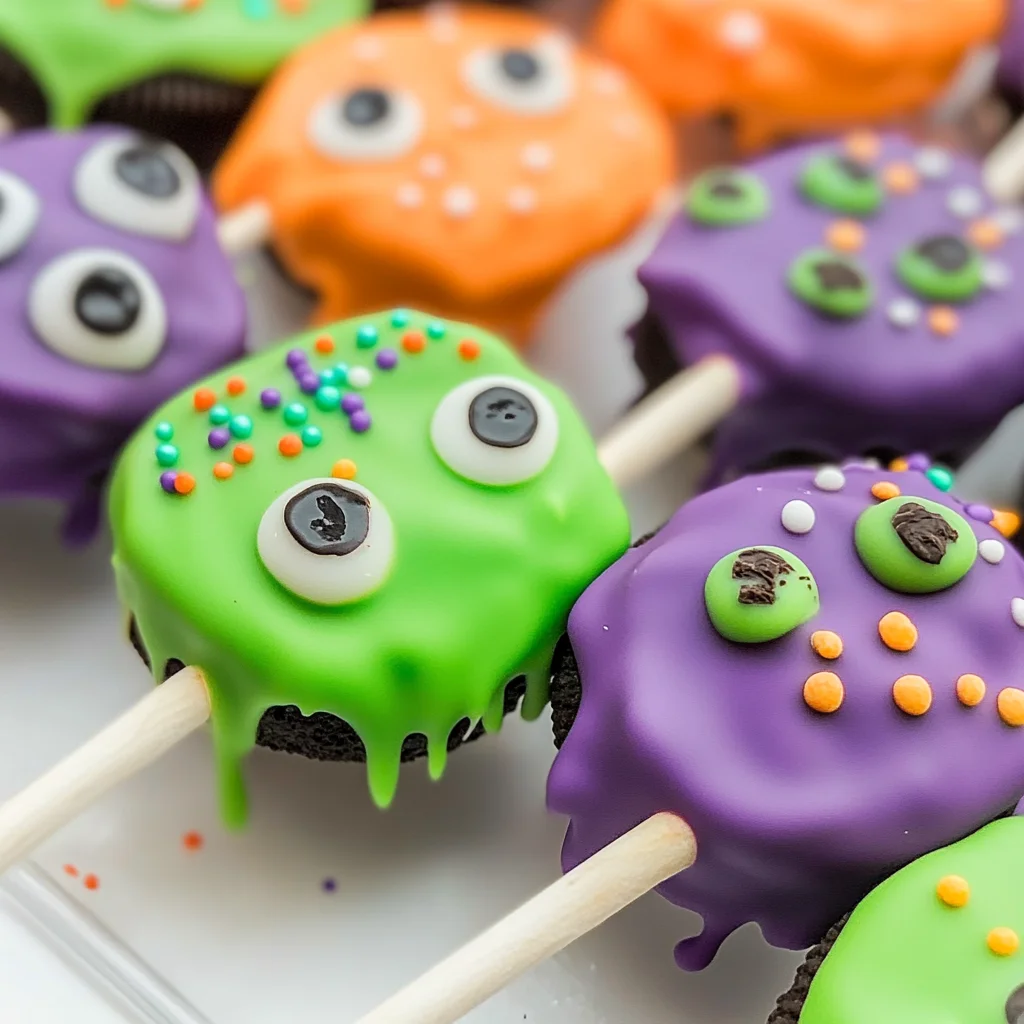
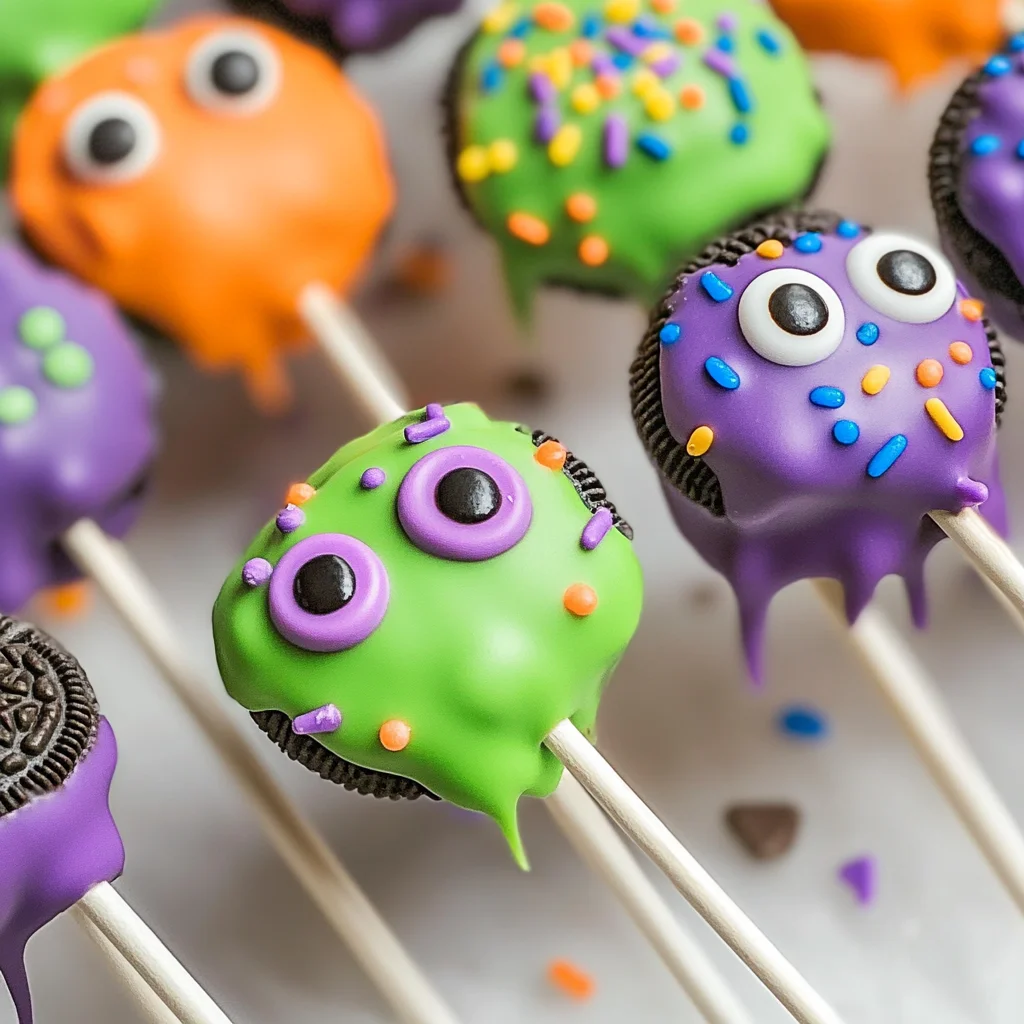
Monster Oreo Pops
If you’re looking for a delightful treat that will bring smiles to faces big and small, then you’ve stumbled upon the perfect recipe! These Monster Oreo Pops are not only super easy to make but also a fantastic way to add a sprinkle of fun to any gathering. Whether it’s a Halloween party, a birthday bash, or just a cozy family night in, these colorful pops will surely steal the show.
What makes this recipe so special is its simplicity and versatility. You can whip up these no-bake Monster Oreo Pops in just under 30 minutes! Plus, they’re an excellent way to get the kids involved in the kitchen. Trust me; they’ll love decorating their own spooky creations!
Why You’ll Love This Recipe
- No Baking Required: These Monster Oreo Pops come together quickly without needing an oven.
- Kid-Friendly Fun: Perfect for little hands to help with dipping and decorating!
- Customizable Creatures: Use your favorite colors and sprinkles to create unique monsters.
- Perfect for Any Occasion: Whether it’s Halloween or just a weekend treat, they’re always a hit.
- Deliciously Sweet: The combination of chocolate and Oreos is simply irresistible!
Ingredients You’ll Need
Gathering your ingredients is half the fun! For these Monster Oreo Pops, you won’t need any complicated items—just simple, wholesome ingredients that are sure to delight everyone.
For the Pops:
- 24 Double Stuffed Oreos
- ½ cup white chocolate melting wafers
For the Coatings:
- 12 ounces green candy melts
- 12 ounces purple candy melts
- 12 ounces orange candy melts
- 3 Tablespoons Crisco shortening (divided)
For Decoration:
- Green, purple, and orange jimmy sprinkles (long not round)
- Candy eyes (multiple sizes)
- 24 Cake pop sticks
Variations
One of the best things about Monster Oreo Pops is how flexible this recipe can be! Here are some fun ideas to switch things up:
- Try Different Cookies: Swap out Double Stuffed Oreos for your favorite flavor—like mint or peanut butter!
- Colorful Melts: Play with other colors of candy melts based on the season or occasion.
- Fun Toppings: Experiment with different sprinkles or even edible glitter for a sparkly effect.
- Dairy-Free Option: Use dairy-free chocolate alternatives if you’re looking for a dairy-free treat!
How to Make Monster Oreo Pops
Step 1: Prepare the Sticks
Begin by taking each cake pop stick and gently poke a hole about ½ inch deep into the Oreo filling. This step is crucial because it secures the stick inside the cookie without breaking it. Just be gentle!
Step 2: Melt the White Chocolate
In a small microwave-safe bowl, add the white chocolate melting wafers. Heat them on 50% power for 1 minute. Stir well and return to the microwave for additional 30-second bursts until smooth. This melted chocolate will act as glue for our sticks.
Step 3: Attach the Sticks
Dip about ½ inch of each cake pop stick into the melted white chocolate. Then place it gently into the hole you made earlier in each Oreo. This helps keep everything steady when we dip them later! Allow them to sit until the chocolate has hardened.
Step 4: Melt Colored Candy Wafers
Next, take your colored candy melts and divide them into small microwave-safe containers. Heat on 50% power or defrost mode for 1 minute. Stir with a fork before adding 1 tablespoon of Crisco to each container. Return to microwave in bursts until silky smooth—this gives us that perfect dipping consistency.
Step 5: Dip Your Oreos
Carefully dip each Oreo into your chosen colored melt until it’s fully covered. Don’t forget to move it side to side slightly so excess chocolate drips off nicely.
Step 6: Decorate Your Monsters
While your coating is still wet, go wild adding sprinkles and candy eyes! Have fun with designs; there are no wrong ways to make these monsters look adorable.
Step 7: Chill and Serve
Let your monster pops rest upright in a cake pop stand inside the refrigerator for about 30 minutes before serving. This allows everything to set perfectly!
Now you’re ready to enjoy your wonderfully spooky Monster Oreo Pops! They’re sure to be a crowd-pleaser at any event. Happy decorating!
Pro Tips for Making Monster Oreo Pops
Creating the perfect Monster Oreo Pops can be a delightful experience, and these tips will help you achieve the best results!
- Choose quality ingredients: Using high-quality Oreos and melting wafers ensures a richer flavor and smoother texture, making your pops even more enjoyable.
- Work quickly with the melts: The candy melts can harden quickly, so have your sprinkles and candy eyes ready to go. This way, you can decorate before the chocolate sets, ensuring they stick properly.
- Use a cake pop stand: If you don’t have one, you can create a makeshift stand using a piece of Styrofoam or an empty cardboard box. This makes it easier to let your pops set upright without messing up their designs.
- Experiment with colors: While green, purple, and orange are classic Halloween colors, feel free to mix it up! You could try blue or pink melts for a fun twist that makes your pops stand out at any event.
- Make them in advance: These treats can be made a day ahead of time and stored in the refrigerator. This not only saves time but also allows flavors to meld together beautifully.
How to Serve Monster Oreo Pops
Presenting your Monster Oreo Pops creatively will make them an even bigger hit! Whether it’s for a Halloween party or just a fun family treat, here’s how you can serve them up.
Garnishes
- Edible glitter: A sprinkle of edible glitter adds an enchanting sparkle that catches the light and mesmerizes everyone.
- Whipped topping: A dollop of non-dairy whipped topping on the side gives an inviting contrast and enhances the overall presentation.
Side Dishes
- Fruit skewers: Colorful fruit skewers made with assorted fruits like grapes, melon, and strawberries offer a refreshing balance to the sweetness of the Oreo pops.
- Veggie platter: Crunchy veggies such as carrots, celery sticks, and bell peppers served with hummus provide a healthy crunch that contrasts beautifully with the soft sweetness of your dessert.
- Popcorn: A bowl of popcorn seasoned with a hint of salt or drizzled with dairy-free chocolate pairs wonderfully well and creates an enjoyable munching experience alongside your treats.
With these tips and serving suggestions in mind, your Monster Oreo Pops will not only taste great but also look absolutely adorable on any table! Enjoy creating this fun treat!
Make Ahead and Storage
These Monster Oreo Pops are not only a fun treat for Halloween but also a fantastic option for meal prep! You can make them in advance, which is perfect for parties or festive gatherings. Here’s how to handle leftovers and store these delightful pops.
Storing Leftovers
- Store leftover Monster Oreo Pops in an airtight container.
- Keep them in a cool, dry place at room temperature for up to 3 days.
- If you prefer, you can store them in the refrigerator to prolong their freshness.
Freezing
- If you want to keep these pops longer, they can be frozen.
- Place the Monster Oreo Pops on a baking sheet lined with parchment paper and freeze them until solid.
- Once frozen, transfer the pops to an airtight container or freezer bag, separating layers with parchment paper if needed.
- They can be stored in the freezer for up to 2 months.
Reheating
- Since these pops are chocolate-covered, they don’t require reheating; simply let them thaw at room temperature when you’re ready to enjoy!
FAQs
Here are some common questions that might pop up when making Monster Oreo Pops!
Can I use regular Oreos instead of Double Stuffed?
Absolutely! While Double Stuffed Oreos add extra creaminess, regular Oreos will work just as well for your Monster Oreo Pops.
How do I make Monster Oreo Pops without candy melts?
If you can’t find candy melts, you can use white chocolate chips mixed with shortening as an alternative. Just follow the same melting instructions!
What is the best way to decorate my Monster Oreo Pops?
Get creative! Use colorful sprinkles, various sizes of candy eyes, and even edible glitter for an extra spooky touch on your Monster Oreo Pops.
How long will my Monster Oreo Pops last?
When stored properly in an airtight container at room temperature, your Monster Oreo Pops will last about 3 days. For longer storage, consider freezing them.
Can I customize the colors of the chocolate coating?
Definitely! Feel free to use any color melting wafers that suit your theme or occasion. The more colorful the better!
Final Thoughts
I hope you have as much fun making these adorable Monster Oreo Pops as I did! They’re perfect for gatherings and bring a delightful touch of creativity and sweetness to your festivities. Enjoy every bite and don’t forget to share your creations with friends and family. Happy Halloween baking!
Monster Oreo Pops

Looking to add a dash of fun to your next gathering? These delightful Monster Oreo Pops are the perfect treat! Easy to make and even easier to enjoy, they’re a colorful addition to any celebration, whether it’s Halloween, a birthday party, or simply a cozy night in with family. With just under 30 minutes of prep time, these no-bake wonders invite creativity as you and your kids decorate each pop with vibrant candy melts and playful sprinkles. Create your own spooky creatures and watch as smiles spread all around!
- Prep Time: 15 minutes
- Cook Time: 15 minutes
- Total Time: 30 minutes
- Yield: 24 servings 1x
- Category: Dessert
- Method: No-bake
- Cuisine: American
Ingredients
- 24 Double Stuffed Oreos
- ½ cup white chocolate melting wafers
- 12 ounces green candy melts
- 12 ounces purple candy melts
- 12 ounces orange candy melts
- 3 tablespoons Crisco shortening (divided)
- Green, purple, and orange jimmy sprinkles
- Candy eyes
- 24 cake pop sticks
Instructions
- Gently poke a hole about ½ inch deep into each Oreo filling for the cake pop stick.
- Melt the white chocolate wafers in the microwave until smooth; dip the end of each stick into the chocolate and insert it into the Oreo.
- Melt colored candy wafers with added shortening until silky smooth.
- Dip each Oreo into the melted color, allowing excess to drip off.
- While wet, decorate with sprinkles and candy eyes.
- Chill upright in a refrigerator for about 30 minutes before serving.
Nutrition
- Serving Size: 1 serving
- Calories: 130
- Sugar: 12g
- Sodium: 40mg
- Fat: 7g
- Saturated Fat: 4g
- Unsaturated Fat: 2g
- Trans Fat: 0g
- Carbohydrates: 16g
- Fiber: <1g
- Protein: 1g
- Cholesterol: 0mg